Steps to Re-landscaping Your Home
Landscapes are not “forever” improvements. Like most other elements of home ownership, they’re never static. Eventually, for whatever the reason, it becomes time to remodel your gardens. It can be overwhelming, until you break it down into smaller pieces.
Landscape Tip 1: Begin with two lists. One list: what you need, expect your landscape remodel to accomplish (new gardens, better patio, more shade, etc.). The other list: the plants and hardscaping that are currently in your existing landscape, and whether they stay, get moved, or go away altogether. You MUST start with those lists.
Landscape Tip 2: Not much landscape info in this tip, but you’re going to need graph paper soon, so go to printfreegraphpaper.com and print their default type and size. It has a quarter-inch grid. Print several copies.
Landscape Tip 3: Work on one part of your landscape at a time. Draw it to scale, and include only those plants and features that definitely WILL NOT change. DO NOT assume that beds have to stay the same shape or size, or that walks, patios, the drive have to stay where they are. Finish your to-scale drawings, then make photocopies. Save the original.
Landscape Tip 4: Use one of the photocopies of your scale drawing to shade in the various use areas (public/front, private/back and service/work). Determine where each space will be. That will be critical in getting maximum use of the land that you have.
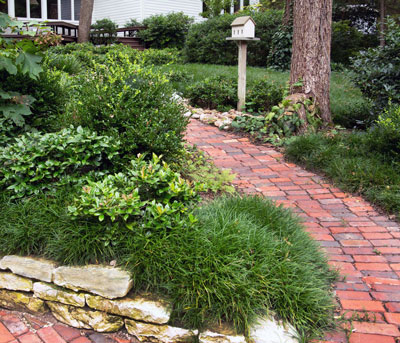
Landscape Tip 5: Start sketching in beds. (Don’t be afraid to change sizes and placement.) Their depth should be proportionate to size of house, probably 4-5 ft. deep at narrowest, broadening to 8-15 ft. at widest. Sketch them, then lay out supple garden hose to be sure you like the design. Long, gentle curves are usually more natural than straight beds.
Landscape Tip 6: Now that we’re ready to start drawing plants into our plan, our goal is to maintain good lines of sight to the focal point. It could be the front door in the public area, or a fountain or statue for the private area. Draw taller plants in toward the sides, then taper down toward the focal point to create a sort of visual “funnel.”
Landscape Tip 7: Most urban lots have room for two shade trees in their front yards. Ideally, they should be off to sides, and not centered in the yard. Hopefully, they won’t align with other things: fence, corner of house, neighbors’ trees, etc. Consider overhead wires, where shade is needed – and all other factors. Plant quality trees.
Landscape Tip 8: Mature tree sizes vary with species. Large types should be at least 15-20 ft. out from house, possibly farther for 2-story homes. Root barriers can prevent damage to foundation should need arise. Remember that branches can do damage to the roof. Reminder: do NOT plant trees in centers of spaces, in line with anything else.
Landscape Tip 9: For enough variety, yet to ensure continuity of look, use 5-7 species of shrubs in front yard, also in back yard. Avoid unnatural-looking straight rows of plants. Cluster them in groups and sweeps of odd numbers of plants, one species per area. Know their mature sizes, and plant at or near those distances (don’t crowd).
Landscape Tip 10: Those clusters and groups of shrubs will grow together, so that they will be perceived somewhat as individual plants. Choose types whose heights will fit the surroundings without formal or regular pruning. Ask before you buy! Use taller types off to sides, again to create the visual funnel toward focal point.
Landscape Tip 11: Groundcovers have several functions, so include them in your landscape remodel. Use them where grass is difficult (areas with less than 4 hours of direct sun; slopes too steep to mow safely; extremely long, narrow areas; and anywhere you want a stairstep transition between low shrubs and turfgrass.
Landscape Tip 12: Good soil is critical, but save “heroic” soil prep for smaller plants (groundcovers, flowers, short shrubs). Larger shrubs must be adapted to your native soil. To improve ANY soil, add organic matter: peat moss, compost, rotted manure, bark mulch. Add several inches, and rototill to 12 inches. In clays, include 1 inch of expanded shale.
Landscape Tip 13: Once you have rototilled all the soil amendments into your new bed, rake to establish a smooth grade that will drain away from the house. Do not cover weep holes in brick veneer walls. Allow for 1 inch of mulch, to be added after planting.
Landscape Tip 14: Use bed edging. Baked enamel, green metal edging is my personal choice. Cut a thin insertion slit with a nursery spade to make the job easier. Use long, sweeping runs of the edging. Leave no more than 1/2-inch of edging showing!!! Other materials can also be used, but use only types that can be lifted and reset.
Landscape Tip 15: Use color to draw attention to focal points (see earlier tip). Have a color scheme, that is, a family of related colors for each landscape “room.” Choose plants so that something will be colorful at any given time, and use only the most dependable types. Annuals give more color for same work, but perennials have charm.
Landscape Tip 16: Decorate with smaller pieces of garden art. While you have a main focal point of each part of your landscape, you can also cheer up small corners, tabletops, entryways, etc. with sundials, small statues, sconces, wall hangings, topiaries, small fountains, potted flowering annuals and other special items.
Landscape Tip 17: We’ve mentioned fountains as major focal points in gardens, but also consider an on-grade garden pond in a sunny location that’s secured from toddlers. Talk to specialists, or hire a skilled contractor to install it for you. Or, consider a trickling water feature or recycling stream. Water is wonderful in any Texas garden.
Landscape Tip 18: Your patio is your family’s outdoor living space. Make it larger, or make it more hospitable. Shade and enclosure help, as does an attractive and interesting, well-draining surface. Consider an outdoor kitchen, and invest in good seating. Add outdoor speakers, soft landscape lighting and a waterproof overhead fan.
Landscape Tip 19: Landscape lighting is the finishing touch. Done by real pros, it makes gardens fun and accessible in cooler nighttime hours. It highlights the beauty spots, and it lets the rest of the garden drift into the shadows. It means full moonlight every night of the year. And, it improves safety and security. You’ll love good landscape lighting.
Also from Neil's Notes...
Transplanting Tips
If you have a tree or shrub that has outgrown its usefulness – if it’s just too large for its surroundings – winter is the prime time to dig and relocate it. Wait until you’ve …